Update with more info:
I ordered mine from www.clipitup.com they have them on sale for $39 until the end of Feb. Shipping is a little high…
Tonight I decided to order the top tier and www.scrapbookingalley.com has the system. The price is a little higher, but if you factor in no sales tax and flat rate shipping of $4.95 it’s cheaper (thank you Arlene). If you order don’t forget to pick up Glimmer Mist. LOL
So stamp storage has always been an issue for me. When I was a Stampin’ Up! hobby demonstrator I collected several (more then several) sets of stamps. Storage was a real issue then, those boxes took up so much room. So I unmounted my SU stamps from the wood and used the EZ Mount foam. I moved all my stamps to CD cases (including the clear). Yeah, not liking that system either. I can’t find a stamp for anything and this included having a binder system, It’s really just too much work for me. I have such limited time to create that I didn’t keep up with updating the binder.
So here is my solution!
The Clip It Up! I’ve only gotten my clear stamps that I still had in the original packages up so far. I’m working on taking my other clear stamps out of the CD cases and sticking them to acetate sheets and then I’ll store them in ziplock bags so I can hang them up.
So far I think I may have more than 50 sets of stamps clipped.
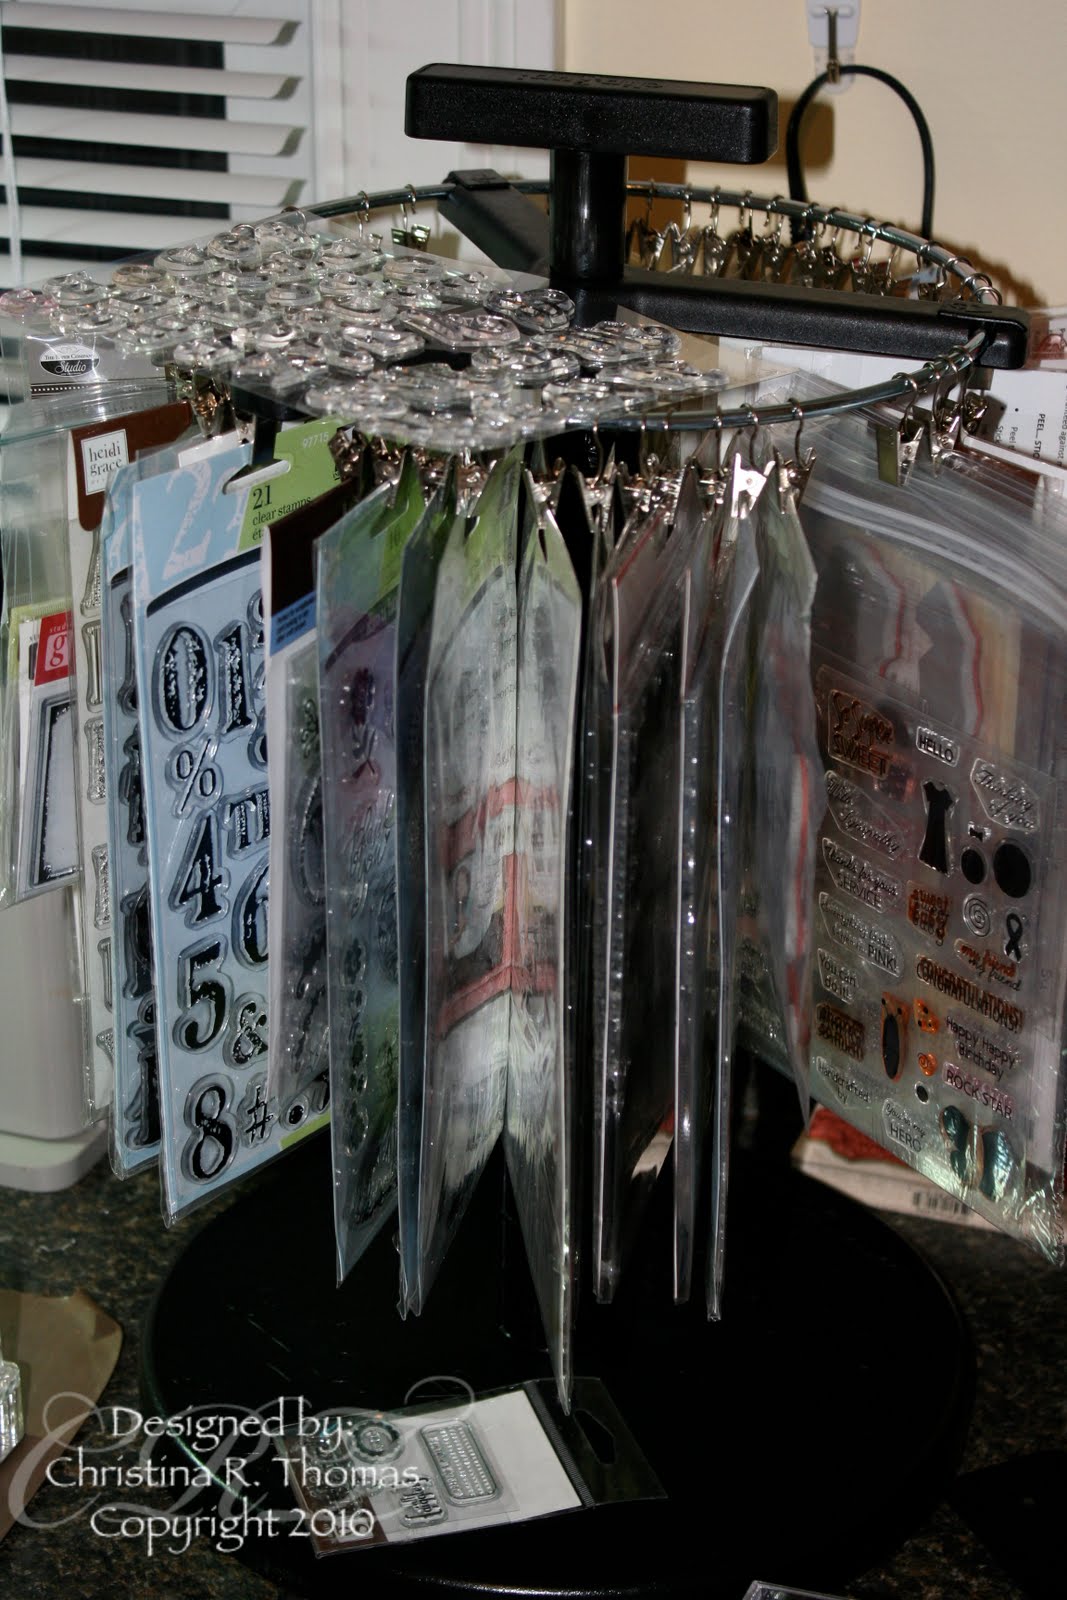
Umm and I think I’m gonna need to order the top tier so I can keep going.


Since you were a Stampin up demonstrator, I was wondering if you knew how I can get a hold of a Roses in Winter Set of 9 by Stampin' Up. Besides not being able to find it, I need to find someone who will ship it to Ireland. If you can help me and tell me where you think I can get it, I would so appreciate it.Micki
Hi Christina! I was having the same problem, only I have a different solution. It is a bit more time consuming, however I LOVE it! I have all of my stamp sets in CD cases still, and ordered alphabetically. Then I made a supply guide, with each set stamped out so that I could see exactly what was in it. I did a blog post on it here:http://crop-and-create.blogspot.com/2010/01/my-supply-guide.htmlLisa
So how many tiers can ya have? LOL
Okie, You can add tiers. Either a small one or you can get the extension that will give you the same amount of room as the lower tier. The base is on sale until the end of Feb at clipitup.com
love the birthday card. you have great ideas
I think we all have the same problems with storing stamps and knowing what we have. My solution was to put the stamp sets in CD cases and store them alphabetically on a CD rack. It really is a space saver for me. I recorded each stamp set by either scanning the stamp set or by cutting their picture out of the order catalog or by printing a picture from the order website. Once I had the picture, I printed it and punched them with a 3 hole punch. I store the pages in a 3 ring binder in alphabetical order. Instead of pulling out all of the CD's to look for a stamp, I pull out the 3 ring binder to find a stamp. The binder gets used alot by me and by stamping friends. It really helps me to use more of my stamps.
Looks like a good system. Thanks for sharing!
i love it! I made my own clip it up storage to hang my clear stamps. I used some clips i got from ikea that are used to hang curtains (they look a lot like the clip up brand ones) and a wooden hanger that has a metal bar across the bottom. I hang my stamps and store them in my hall clset.It works amazing! I would of bought a clip up but i didn't have any counter space for it. I love your blog!
I have this storage system in the UK (look on my blog) and its brilliant. I am really happy with it. I love that I got this system and that Jennifer Mcguire and you have it too, lol.
My thought about the Clip up is -Do you have to go around looking at all the stamp sets until you find the one that you are looking for. Clip it also costs big bucks. I saw where someone used a curtain rod or dowel rod hung on a wall or below a shelf. Then use the curtain rings with alligator clamps to clamp on the bag. Or you can purchase clips at a office supply place that hooks onto a name badge. It has a plastic piece that snaps shut (around the dowel & moveable) & has the alligator type clip on the other end-that would attach to the plastic bag with the stamps in it. It is kinda hard to describe. Then you could make cardboard dividers that would name the catagory that the stamps are in. IE: nature, faces, verses, vintage, alphabet,etc. These dividers would slip on the rod & also correspond to dividers used in a binder with pictures of all the sets. I have a lot of wood mounted stamps taking up a lot of room. I try to keep track of all the stamps in a binder with catagories. I go to Michaels & purchase large clear plastic poster frames (have 1″ sides). I put my wood stamps in these with pic up. I try to store them in same catagories. I made a box out of white laminate shelving board that has holes for pegs for the shelves. I have shelves about every 2 inches which is enough for these frames full of stamps. It works well but takes up a lot of storage space. I have unmounted stamps in a binder stored on pages made for them. I am a visual person. If I don't see it, I won't use it. I like to have things handy. I am stumped on storing ink pads. Why aren't there more things to choose from for storing stamppads?
Hey there Christina!!! I tried ordering mine from “Two Peas” & they were sold out, where did you find yours? hugs, Emma:)
Another great idea. I have my stamps currently stored in an over-the-door shoe holder, which holds a bazillion of my Stampin' Up stamps, but this would afford me the ability to keep some right on my work table. Thanks!Rhonda716
Hey Christina!Check out my youtube: Felkatz80 .. i did a video of my homemade CLIP IT UP! it fits alot and INEXPENSIVE!!! kat
I took them out of the original packages to cut down on bulk. Now I see it would have been better to keep them in the package. I'll think of something one of these days!
You didn't tell us where you found this. I'm still trying to figure out what I am going to do.Nana Jo
Ok, I read the rest of the comments, guess I should have done that first. Great buy and I think I should try that system too.Nana Jo
Sorry All I should have told you where to get it. I got mine at http://www.clipitup.comIt's on sale until the end of Feb for 39.00…..Great price
I have a Clip it Up too. I've got a three layer one but I need to organize the stamps hanging up because I end up turning it and looking at every set to find the ones that I want each time.
I saw in Utube a video using an old lampshade (large one) and they ripped off the cover and kept the metal frame. They then used the ikea clips to clip them on. So I decided I wanted a smaller version so I got a small (not mini) lamp shade and painted it red then clipped my stickers in groups for example(letters, nostolgic ect.). It sits so sweet on my table and helps me to know what I have. Thanks for sharing the info and shipping info I really appreciate it!